初めに
初めまして。株式会社スパーククリエイティブで身長が一番高いクライアントエンジニアの森田です。
Unity2017から使用できるTimelineを知っていますか?カットインやガチャの演出など様々なところで使用されているのを最近よく見かけます。
Timelineを再生するためにはTimeline エディターウィンドウ でアセット組んだりと色々設定をしますがこちらについての説明は次回以降にしようと思います。
今回はTimelineを再生するのに必要な Playable Director コンポーネントではなく コンポーネントの名前にもなっている 「Playable」について書いていきます。
Playable API は Timelineと同様2017から本実装された機能です。
blogs.unity3d.com
Playable APIの機能の一つPlayableGraph、
PlayableGraphをエディタ上で確認できるPlayableGraph Visualizerがあります。
この記事ではPlayableGraphを利用してアニメーションクリップとオーディオクリップを再生、それをPlayableGraph Visualizerで確認するところをゴールとします。
Playable APIについて
Playable API で用意されている3つの大きな要素
| playable | パーツ |
| playableOutput | いくつかのパーツを組み合わせた結果を出力する |
| Playable Graph | 複数のplayableOutputまとめている |
playable
IPlayable インターフェースを実装する C# 構造体
アニメーションやオーディオを制御する
ユーザーが自前で用意することもできる
PlayableExtensions クラスに拡張機能がある
| 種類 | Playable 型 | 概要 | 静的関数Createを呼ぶときに必要なもの |
|---|---|---|---|
| アニメーション | AnimationClipPlayable | アニメーションを再生する際に使用される AnimationClip を持つ Playable | AnimationClipアセット |
| AnimationMixerPlayable | 複数のアニメーションのPlayableをまとめることができる Playable | まとめる個数 | |
| AnimatorControllerPlayable | Animatorで制御されている Runtime Animator Controller を持つ Playable | Runtime Animator Controller アセット | |
| AnimationLayerMixerPlayable | Animator Controllerにあるレイヤー機能を使用することができる Playable | レイヤーの数 | |
| オーディオ | AudioClipPlayable | オーディオを再生する際に使用されるAudioClipを持つ Playable | AudioClipアセット |
| AudioMixerPlayable | 複数のオーディオのPlayableをまとめることができる Playable | まとめる個数 | |
| ユーザー | ScriptPlayable<> | Playable をユーザーが定義できる | PlayableBehaviour クラスから継承した Playable |
playableOutput
IPlayableOutput インターフェースを実装する C# 構造体
PlayableGraph の出力を定義する
アニメーション、オーディオ、ScriptPlayable用がある
| 種類 | playableOutput 型 | 概要 | 生成時に必要なもの |
|---|---|---|---|
| アニメーション | AnimationPlayableOutput | AnimationClipPlayable、AnimationMixerPlayable、AnimationLayerMixerPlayableを接続することができる | アニメーションを再生させたいオブジェクトにアタッチされているAnimatorコンポーネント |
| オーディオ | AudioPlayableOutput | AudioClipPlayable、AudioMixerPlayableを接続することができる | オーディオを再生させたいオブジェクトにアタッチされているAudioSourceコンポーネント |
| ユーザー | ScriptPlayableOutput | PlayableBehaviour クラスから継承した Playableを接続することができる |
PlayableGraph
複数のplayableを操作することができる
playable を作成、接続、破棄をする
PlayableGraph Visualizerについて
PlayableGraphを確認することができるデバッグツール
導入方法
PlayableGraph VisualizerはGitHubにて公開されています。
github.com
UnityPackageManagerを利用するか、直接Zipをダウンロードし解凍した後プロジェクトの中に置いてください。
docs.unity3d.com
確認方法
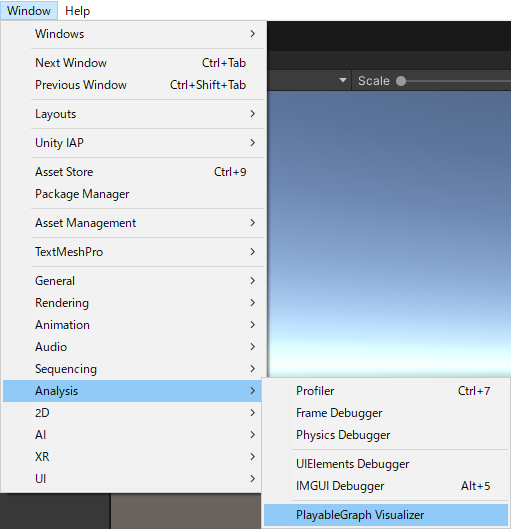
Window > Analysis > PlayableGraph Visualizer にて PlayableGraph Visualizerウィンドウを表示することができます。
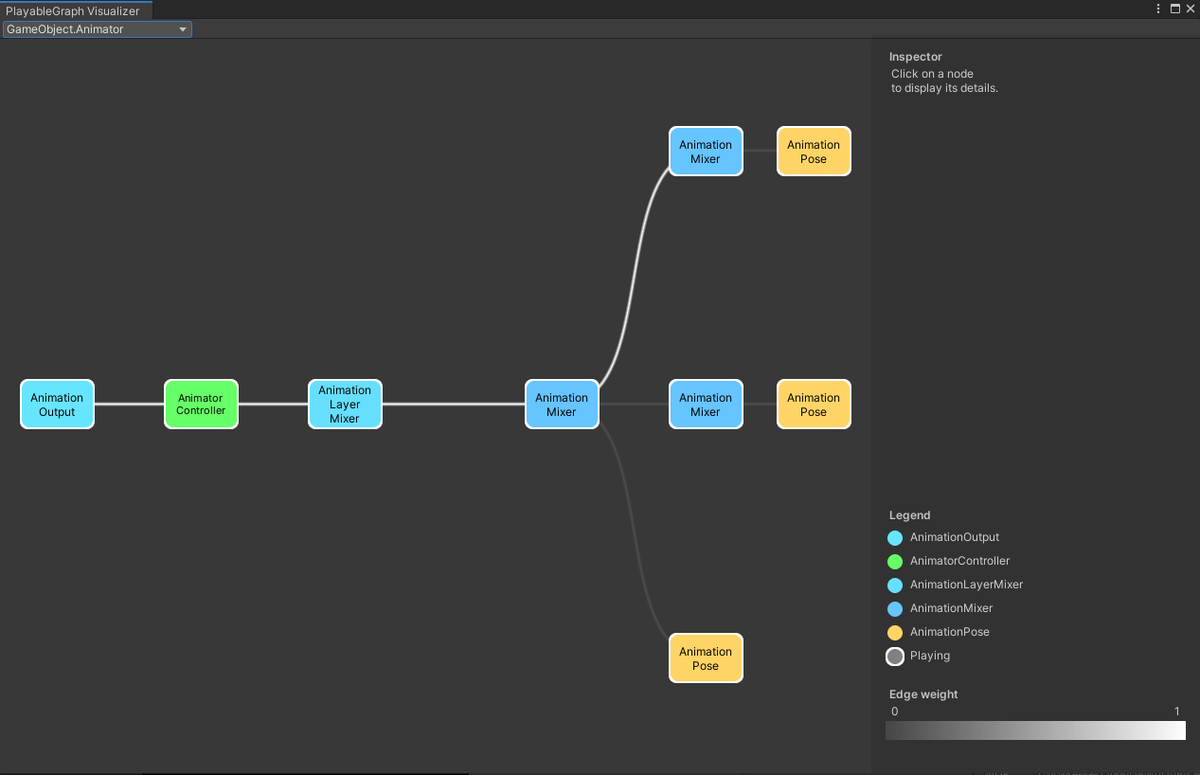
下記は、AnimatorクラスのControllerを設定した時のグラフです。
※Unityのバージョンが2018、2017の場合、Window > PlayableGraph Visualizer にて確認することができます。
実装
ここから実際にUnityで実装していきます。
アニメーション
以下はアニメーションクリップを再生するスクリプトです。
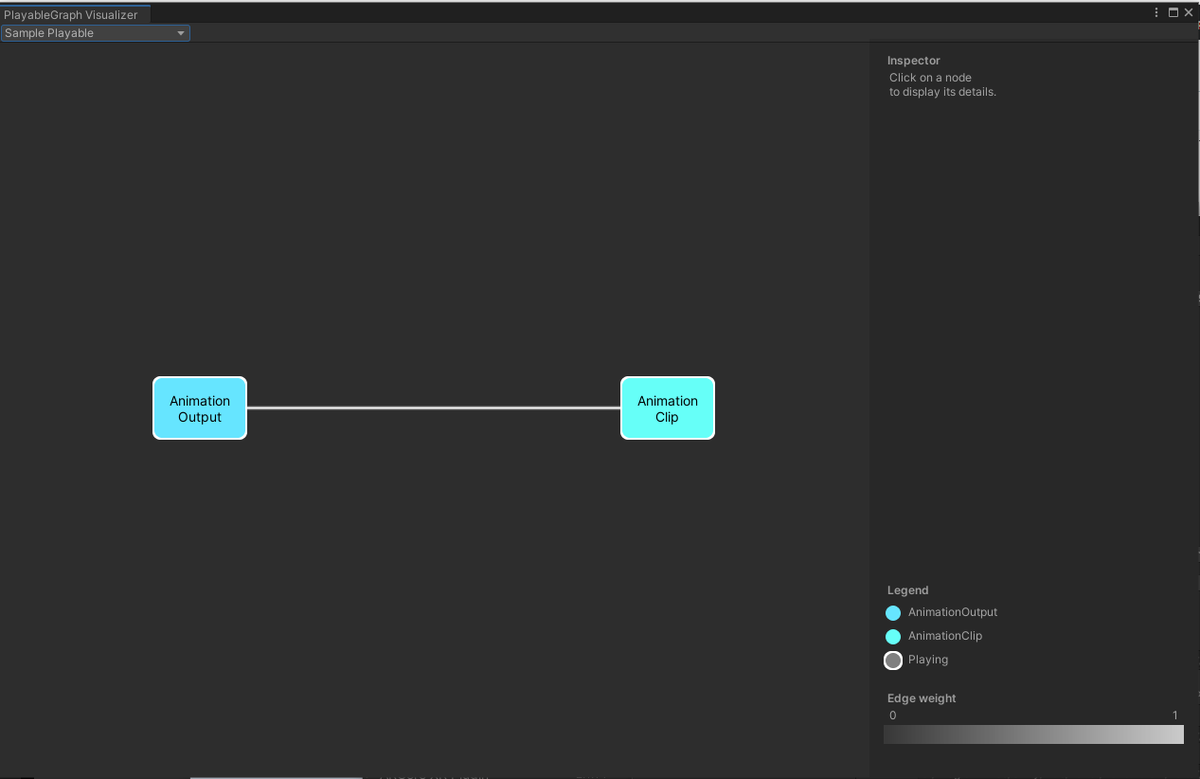
using UnityEngine;
// PlayableGraph クラスを使用するための Namespace UnityEngine.Playables の宣言
using UnityEngine.Playables;
// AnimationClipPlayable クラスや AnimationPlayableOutput クラスを使用するための Namespace UnityEngine.Animations の宣言
using UnityEngine.Animations;

// アニメーションを再生させるためAnimatorコンポーネントが必要
[RequireComponent(typeof(Animator))]
public class SampleAnimationPlayable: MonoBehaviour
{
    // プレイグラフ
    PlayableGraph playableGraph;

    // 再生したいアニメーション
    public AnimationClip clip = null;

    // Start is called before the first frame update
    void Start()
    {
        // PlayableGraph を作成する。
        playableGraph = PlayableGraph.Create("Sample Playable");

        // playableGraphに再生するクリップを指定してAnimationClipPlayableを作成する
        AnimationClipPlayable animationClip = AnimationClipPlayable.Create(playableGraph, clip);

        // playableGraphにAnimationPlayableOutputを作成する
        AnimationPlayableOutput output = AnimationPlayableOutput.Create(playableGraph, "Sample Output", GetComponent<Animator>());

        // outputにplayableを接続する
        output.SetSourcePlayable(animationClip);

        // Graphを再生させる
        playableGraph.Play();
    }

    void OnDestroy()
    {
        // PlayableGraph を手動で破棄する。
        // ※PlayableGraph で作成したすべての playable と playable の出力を自動的に破棄する
        // この破棄のメソッドを手動で呼び出さなければなりません。そうでない場合は、エラーメッセージが表示されます。
        // PlayableGraph was not destroyed.
        playableGraph.Destroy();
    }
}
処理の順番は、
- PlayableGraph を生成。
- AnimationClipPlayableを生成。(ここで再生したいAnimationClipを指定する。)
- AnimationPlayableOutput を生成。(ここでアニメーションを再生したいAnimatorコンポーネントを指定する。)
- 2で用意した AnimationClipPlayable と3で用意した AnimationPlayableOutput を接続する。
- PlayableGraph を再生。
となっています。
また PlayableGraph は手動で破棄処理をしなければいけないためOnDestroy()時にPlayableGraph.Destroy()を呼んでいます。
用意したスクリプトをアタッチすると再生以降アニメーションを再生するようになります。
オーディオ
以下はオーディオクリップを再生するスクリプトです。
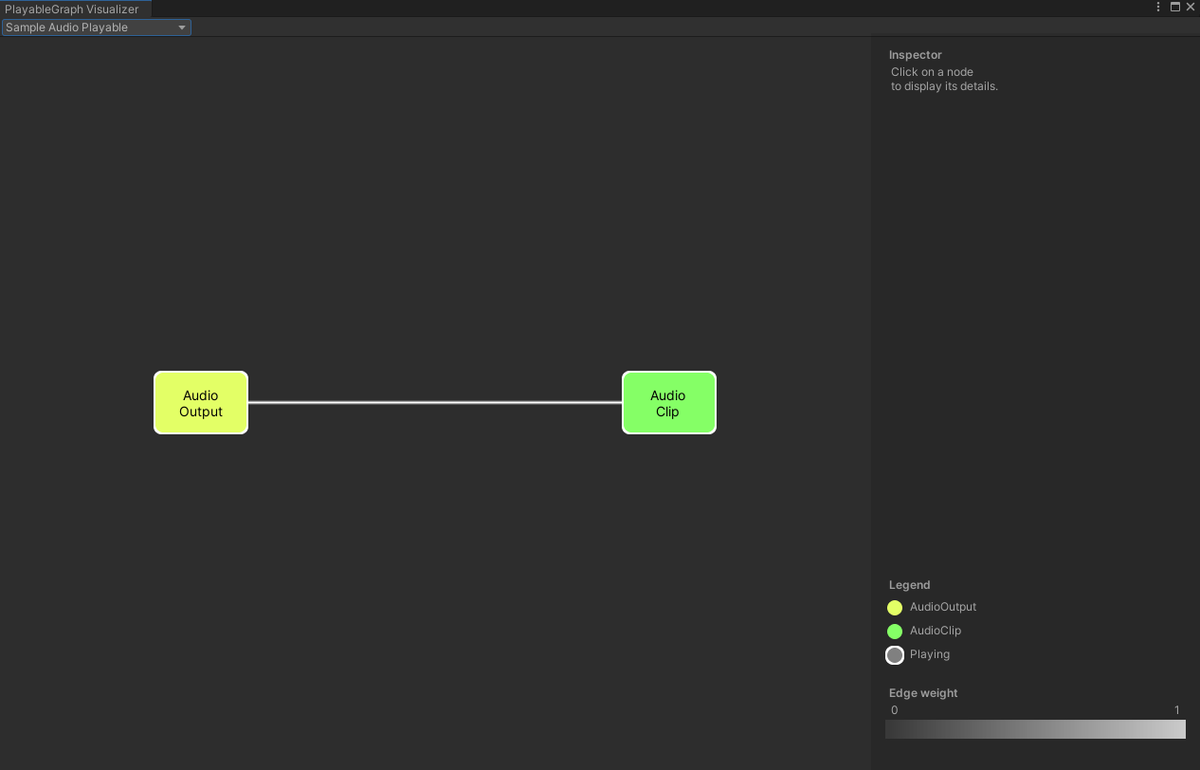
using UnityEngine;
// PlayableGraph クラスを使用するための Namespace UnityEngine.Playables の宣言
using UnityEngine.Playables;
// AudioClipPlayable クラスや AudioPlayableOutput クラスを使用するための Namespace UnityEngine.Audioの宣言
using UnityEngine.Audio;

// オーディオを再生させるためAudioSourceコンポーネントが必要
[RequireComponent(typeof(AudioSource))]
public class SampleAudioPlayable : MonoBehaviour
{
    // プレイグラフ
    PlayableGraph playableGraph;

    // 再生したいオーディオ
    public AudioClip clip = null;

    // Start is called before the first frame update
    void Start()
    {
        // PlayableGraph を作成する。
        playableGraph = PlayableGraph.Create("Sample Audio Playable");

        // playableGraphに再生するクリップを指定して AudioClipPlayable を作成する
        bool isLoop = false;
        AudioClipPlayable audioClipPlayable = AudioClipPlayable.Create(playableGraph, clip, isLoop);

        // playableGraphに AudioPlayableOutput を作成する
        AudioPlayableOutput output = AudioPlayableOutput.Create(playableGraph, "Sample audio Output", GetComponent<AudioSource>());

        // outputにplayableを接続する
        output.SetSourcePlayable(audioClipPlayable);

        // Graphを再生させる
        playableGraph.Play();
    }

    void OnDestroy()
    {
        // PlayableGraph を手動で破棄する。
        // ※PlayableGraph で作成したすべての playable と playable の出力を自動的に破棄する
        // この破棄のメソッドを手動で呼び出さなければなりません。そうでない場合は、エラーメッセージが表示されます。
        // PlayableGraph was not destroyed.
        playableGraph.Destroy();
    }
}
処理の順番は、アニメーションの時とほぼ同じです。
- PlayableGraph を生成。
- AudioClipPlayable を生成。(ここで再生したいAudioClipを指定する。)
- AudioPlayableOutput を生成。(ここでオーディオを再生したいAudioSourceコンポーネントを指定する。)
- 2で用意した AudioClipPlayable と3で用意した AudioPlayableOutput を接続する。
- PlayableGraph を再生。
となっています。
今回は以上となります。
次回はTimelineを内容を書きたいと思っていますが、もっと面白そうなことが思いついたらそちらを書くかもしれないです。
最後まで読んでいただきありがとうございました!