- Introduction
- A basic overview of the SPCRJointDynamics components
- A little bit about the asset preparation
- A lot more Examples
- Power of SPCR
Introduction
Hi there, This is Piyush Nitnaware from Spark Creative, Tokyo, Japan.
Today’s blog is about an open-source physics engine called SPCRJointDynamics. This is also my personal choice to use this engine for cloth simulation in the game. The main feature of this engine is that it uses C# job system internally for its calculation therefore we can use our main thread for our game-play stuff.
The purpose of this blog is to guide you through the step-by-step process of implementation of this plugin into your game.
What is SPCRJointDynamics?
SPCR stands for Spark Creative (Japan-based company name), and the Joint Dynamics suffix means this engine works on joints (bones) to simulate the physics of the cloth.
Why use SPCRJointDynamics?
- Because it's an open-source plugin and you don’t have to pay anything.
- It uses C# job system internally so it won’t cause performance issues in your game.
- You can change its code as per your requirement.
How can I get this plugin:
Here is the GitHub link.
Unity : https://github.com/SPARK-inc/SPCRJointDynamics
UE4 : https://github.com/SPARK-inc/SPCRJointDynamicsUE4
Compatibility
To use this plugin Unity 2018 + is required.
Basic information about the plugin
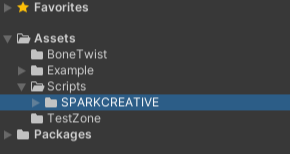
Once the plugin is installed in your project, you can see the SPARKCREATIVE folder inside the Scripts folder.
A basic overview of the SPCRJointDynamics components
There are a few components that SPCR joint dynamics offer.
1. SPCRJointDynamicsController
Hold and maintain the references of other SPCR components. We also can call it a parent-level component. You can change/update the physics settings of your simulation here.
Please note that, some of the settings won’t reflect on the runtime so make sure you update the physics settings at edit time then rerun the simulation.
2. SPCRJointDynamicsPoint
This component acts as a point, so we can add this component on every joint bone. Please note that you can add only one component on the same game object, because same bone cannot be updated by two point behaviours at least not in this plugin.
3. SPCRJontDynamicsCollider
SPCRJointDynamics uses it’s own component to detect collision. You can add this component on any game object (outside of SPCRJointDynamicsController also possible).
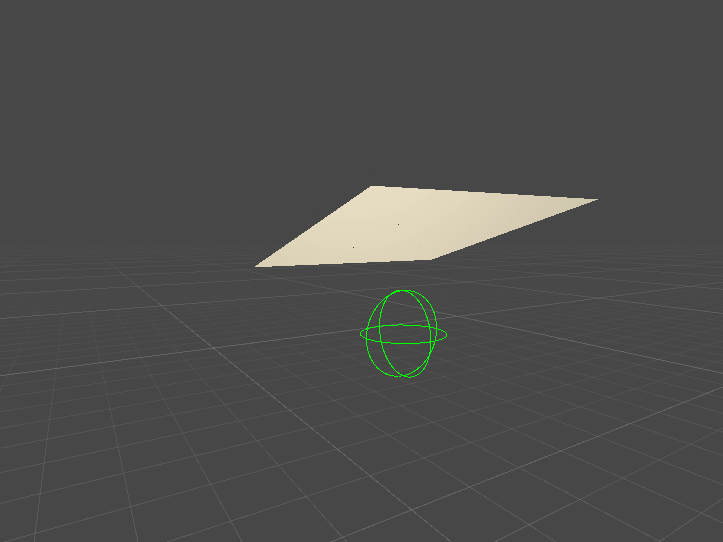
4. SPCRJointDynamicsPointGrabber
By adding this component you can grab any joint point at runtime, you can imagine this behavior like you bind a handler(grabber) in the middle of the rope. Now imagine how that rope will behave when you move that handle. This grabber can be used to achieve exact behavior.
5. SPCRJointDynamicsJobManager
A new game object with this component attached will be added at runtime when you play the simulation so you don’t need to care about this component.
A little bit about the asset preparation
You just need to import an fbx with skinned bones to work with this plugin.
Here is a basic explanation of a sample asset that I had created in Blender.
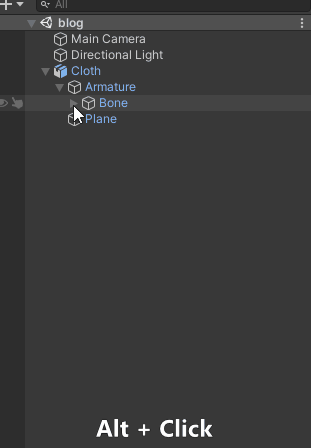
As you can see in the below screenshot, ‘Cloth’ is our main game object on which we are going to add SPCRJointDynamicsController component. Inside the Cloth game object, the first child is ‘Armature’. Armature is nothing but the game object which is containing our root bone and the skinned mesh renderer game object. The very first child of the Armature is a ‘Bone’ game object, we will consider this as our parent transform because this is a parent of all the root bones. The direct child of the parent transforms are our root bones and the child of root bones are our joint points.
The last game object is a Plane game object which is having skinned mesh renderer attached.

Adding SPCR components
Let’s start by setting up the joint points.
First, expand and select all the child game objects inside our parent transform bone just by holding the Alt key while clicking on the arrow icon as shown in the below GIF image.
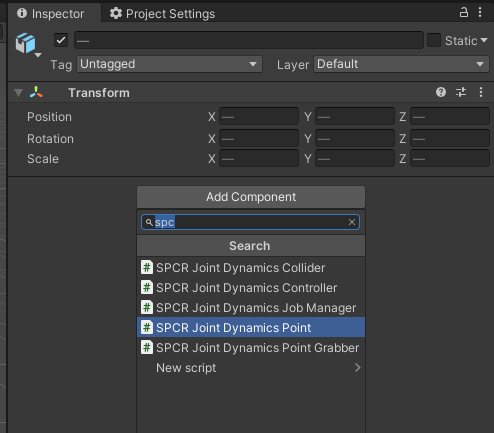
Then add SPCRJointDynamicsPoint component to them.
That's it for adding joint component.
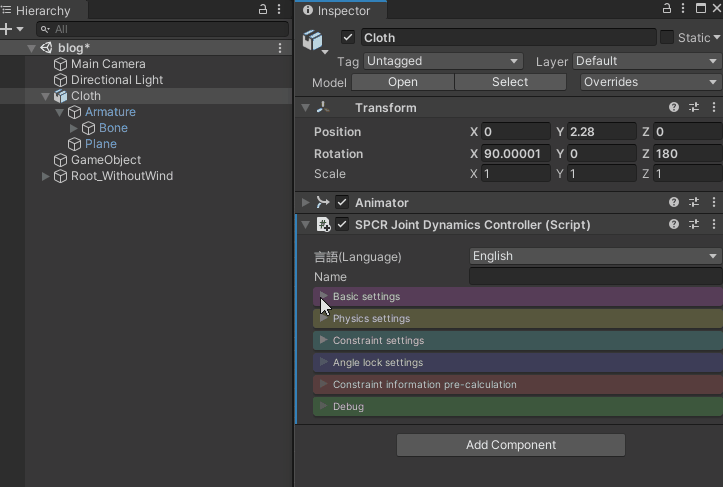
Now select our main game object (cloth game object in this example) and then add SPCRJointDynamicsController component to it.
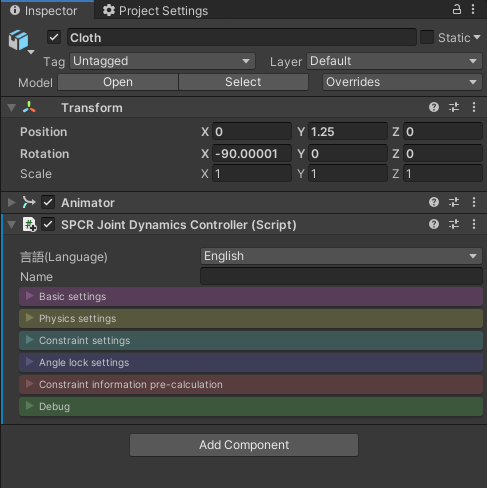
Feed the references to the SPCRJointDynamicsController
You can change the language Japanese/English from the [言語Language] drop down button.
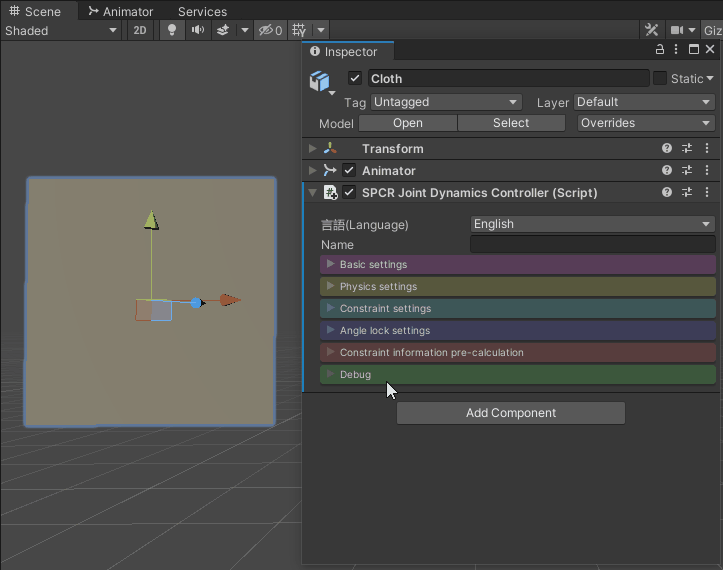
Open the basic settings tab and assign our parent transform (Bone game object) to the Parent Transform slot as shown in the below GIF image.
Apply constraint setting
Now open the ‘Constraint information pre-calculation’ tab, where you can see that by default structural and bending constraints are already checked. For this demo as well, we will go with the default settings. So keep all the settings as it is and click on the From Root Points button.
Also, keep in mind that whenever you change or update the constraint settings, you need to click on this button so that SPCRJointDynamicsController update these new settings into the memory.

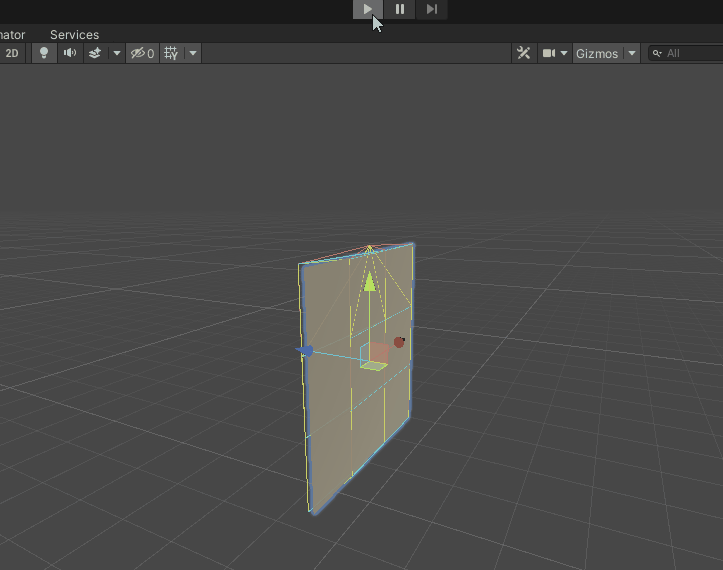
To visualize the changes let’s enable them in the debug option.
Open the Debug tab and check the Structural (vertical, horizontal) and Bending (vertical, horizontal) toggle buttons. Now you can see the constraints in the scene window.
Please note that some debug options only reflect in runtime, so you need to play the simulation to see those options in action.
Play the simulation
Now if you click the Play button, you can see the simulation is working. You can change the cloth’s transform while the simulation is running as shown in the below gif screenshot.
Adding Colliders
Adding a collider is fairly simple, and can be done in few clicks.
Here is the simulation once the collider added.
A lot more Examples
There are lot more examples in the the package.
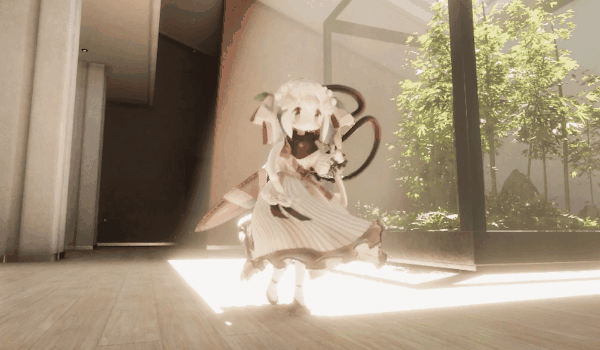
Power of SPCR
With this plugin you could achieve something like this.
I hope this blog might give you a understanding of how to use this plugin.
Thanks for taking your time to read this blog.